
How to remove and re-install the front wheel on a 2007-2008 Honda CBR600RR
By
George
on
January 22, 2013
As with most bike maintenance, rather than having a motorcycle shop do the work for me, I prefer to remove and re-install the wheels myself. There are several reasons for it. The most important is knowing that the job is done right. Because, in a very real sense, I trust my life to my bike. Another is just a matter of convenience: if a tire is flat, I would hate to have to go through the hassle of borrowing a pickup truck and loading the bike in the bed, just to be able to bring it over to the shop so they can change a tire. So, without further ado…
Tools and equipment:
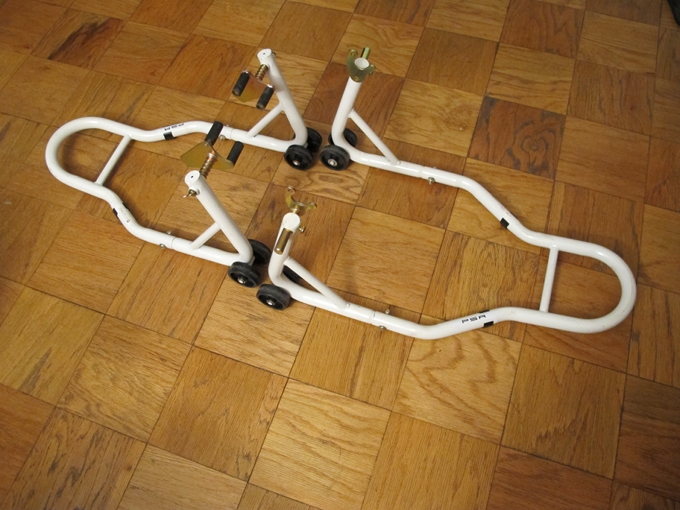
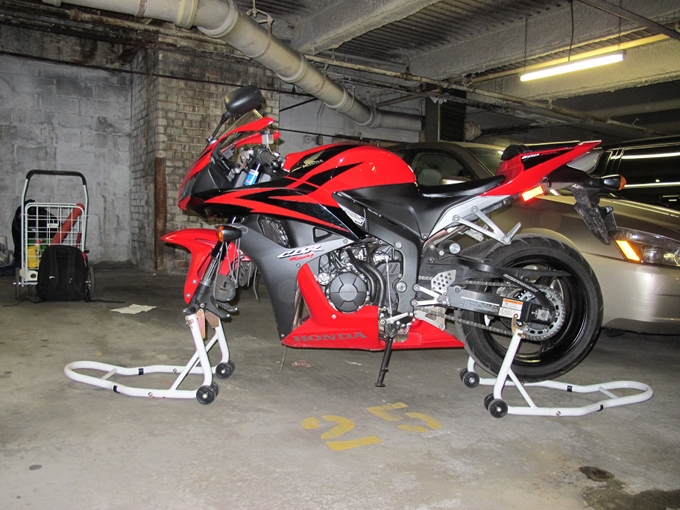
Front and rear stand
Use both a front and a rear stand for stability. I have a set of el-cheapo PSR stands. Boy do they suck. Flimsy construction, bad welds, and clearance issues that constantly have to be worked around. I wish I had a set of Pit Bull stands. When I got the PSR’s, I thought “what the hell, a motorcycle stand is a motorcycle stand”. But it didn’t quite turn out that way. This is a piece of equipment where you get what you pay for.
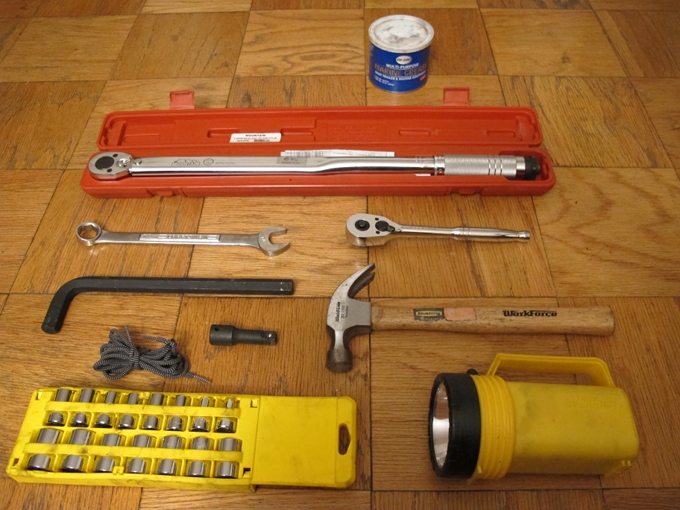
Hand tools
1/2″ sockets: 22mm, 14mm, 12mm
Hammer
Grease
Blue Loctite
Flashlight
Two pieces of thin rope, or zip ties, or pieces of wire to secure calipers. I used a couple of old shoelaces, each one 4 or 5 feet in length.
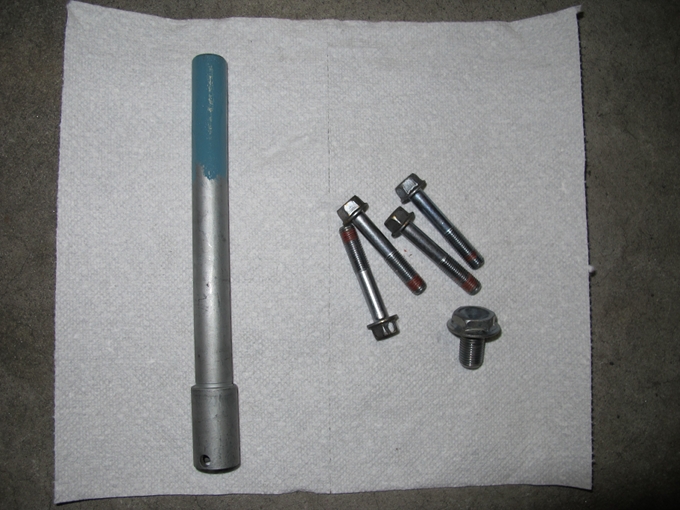
I also needed a three inch 1/2″ socket extension and a 22mm (7/8″) open ended wrench because my socket wrench wasn’t clearing the front stand when turning the axle bolt. You may not need these if you have a stand that doesn’t present clearance issues.
Instructions:

My workspace
Find a place to work. Ideally your work area is comfortably warm, brightly lit, and has a level surface. I have to make do with a cold and relatively dark apartment building garage. If you’re in the same boat, a bright flashlight is a must, as are some warm work duds. Oh, and grab something to sit on. I use an old paint bucket.
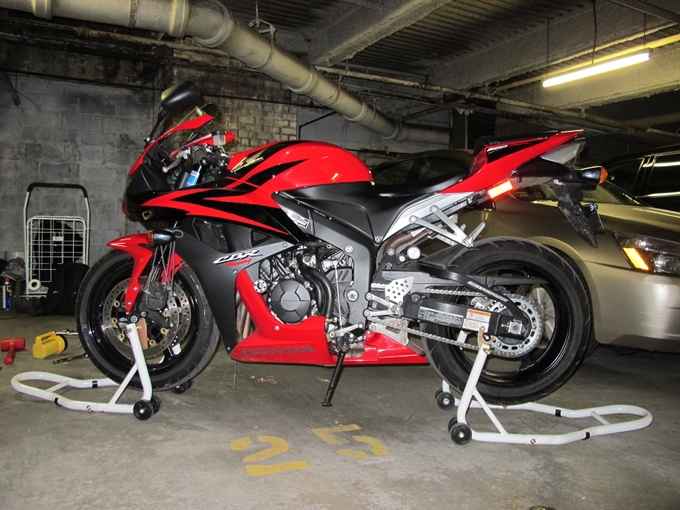
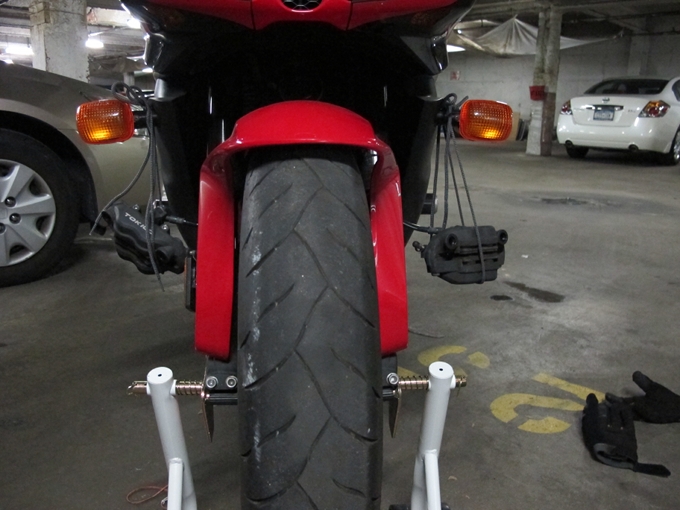
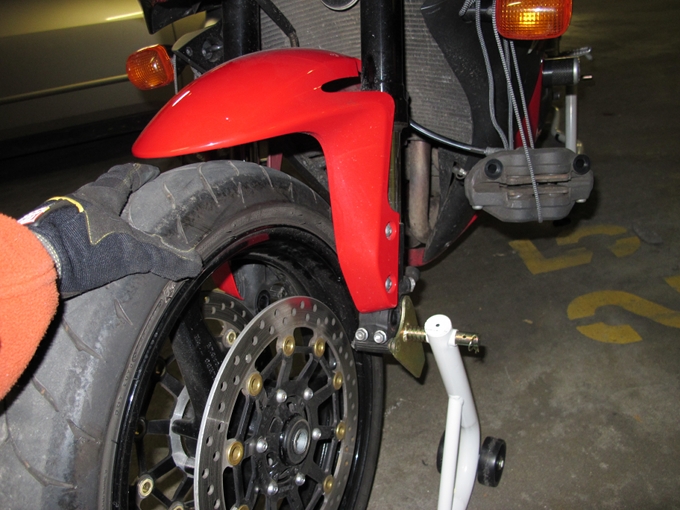
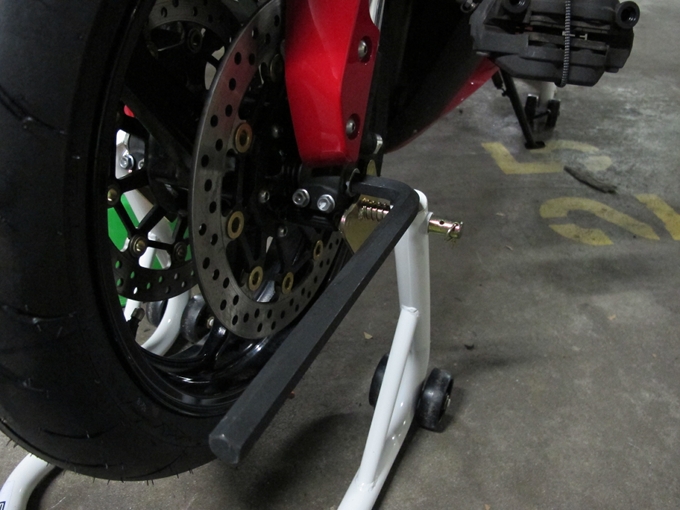
Bike on stands
Use both a front and a rear stand for stability. The order in which you put the bike on the stands is important: Rear first, then front. You never want to have the bike on only the front stand: that leaves it quite vulnerable to tipping over. Ask me how I know.
PS. Ignore the front brake caliper hanging off the front blinker already. I forgot to snap a photo showing just the stands from the get-go, so I used a shot from a little further along that clearly shows both stands in place.

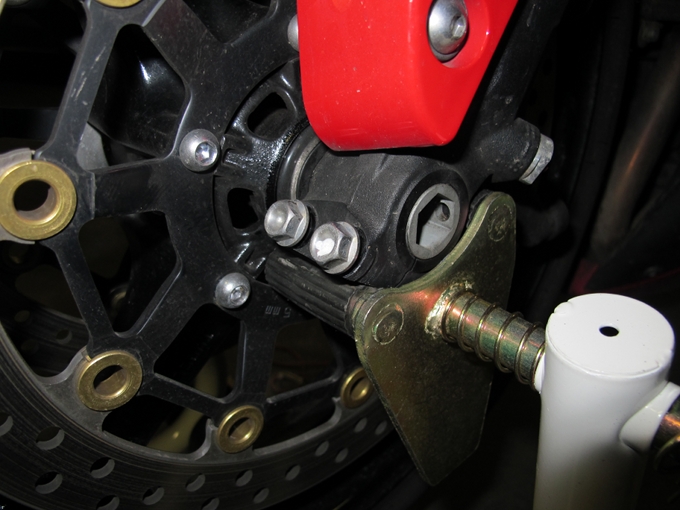
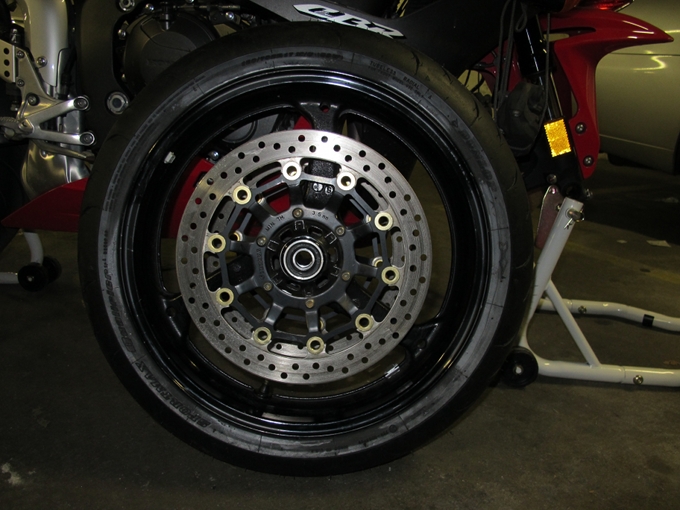
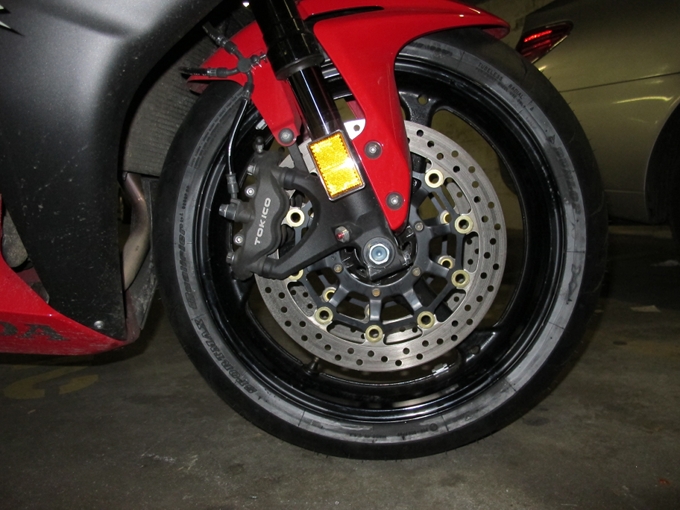
Front wheel profile from right
You can see the bolts we’ll be working with on the right (throttle) side of the bike.
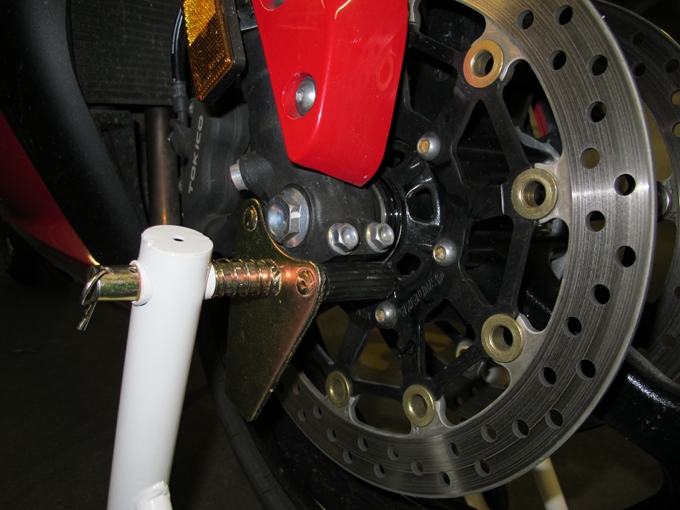
Loosen the two 12mm axle holder bolts on the right (throttle) side.
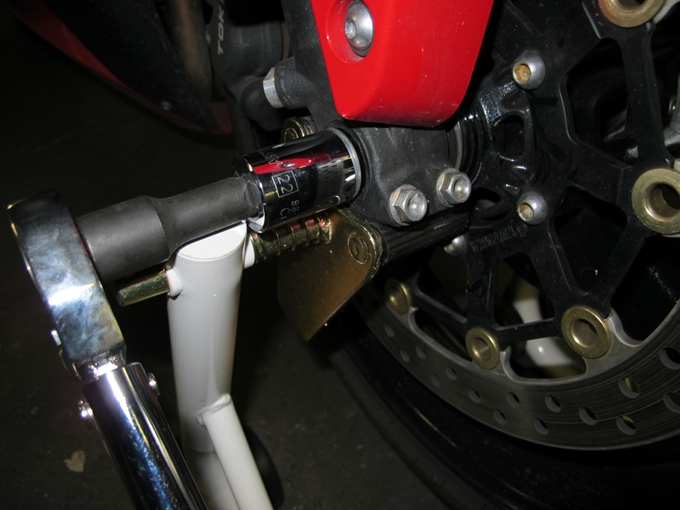
Remove the 22mm axle bolt.
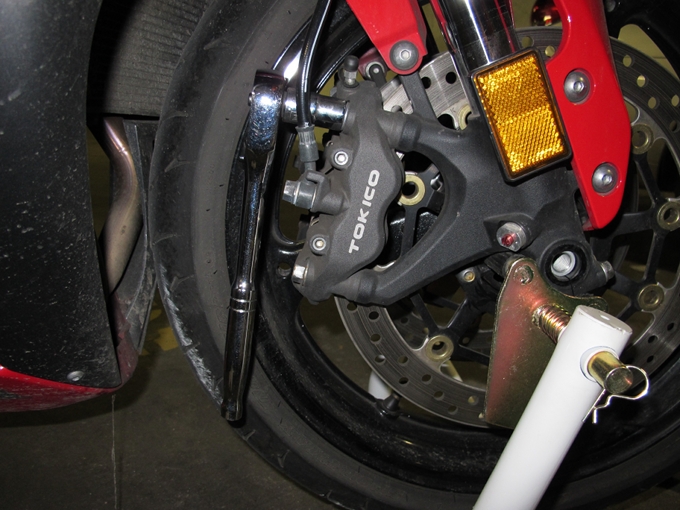
Remove the two 14mm right (throttle) side caliper mounting bolts.
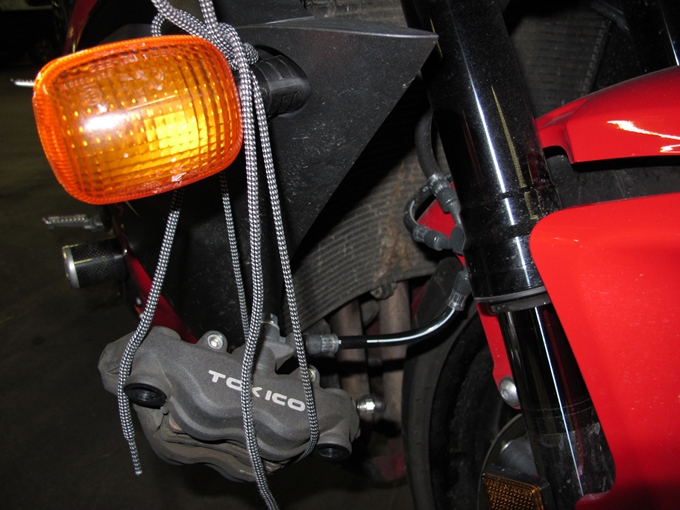
Slide the caliper off the rotor.
This is where your zipties, or pieces of wire, (or shoelaces) come into play. When removing the caliper, don’t put any undue stress on the hydraulic brake line. The last thing you want to do is to leave the caliper hanging by the hose. I looped a shoelace around the caliper body and tied it to the blinker. If you know of a better way, then tell me!
Unbolt, remove, and support the left caliper.
We’re done with the right side of the bike. Move over to the left (clutch) side. Start by removing the left caliper.
Proceed to loosen the two 12mm axle holder bolts on the left (clutch) side.

Now go back to the throttle side and lightly tap the axle out through the fork. I used a 6″ length of 1/2″ socket extension as a punch.
Tap, don’t pound. If the axle isn’t coming through with light taps, take a closer look to see whether something is obstructing it’s path. Remove the axle, moving the front wheel up and down a little if necessary.
Remove the front wheel. If you hear the sound of something small and metal hitting the ground, that means one of the wheel collars may have gotten loose.
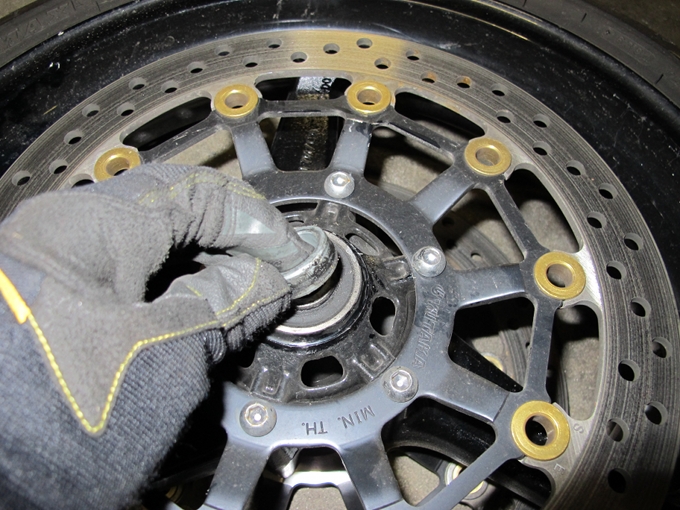
Remove the two wheel collars (small, round discs). There is one sitting in the center on each side of the wheel. Honda’s service manual lists them as different, with the one on the right (throttle) side being bigger. They’re identical on my bike, though. Go figure.
I throw the wheel in the truck and go to the bike shop to get the new tire mounted and high-speed balanced.
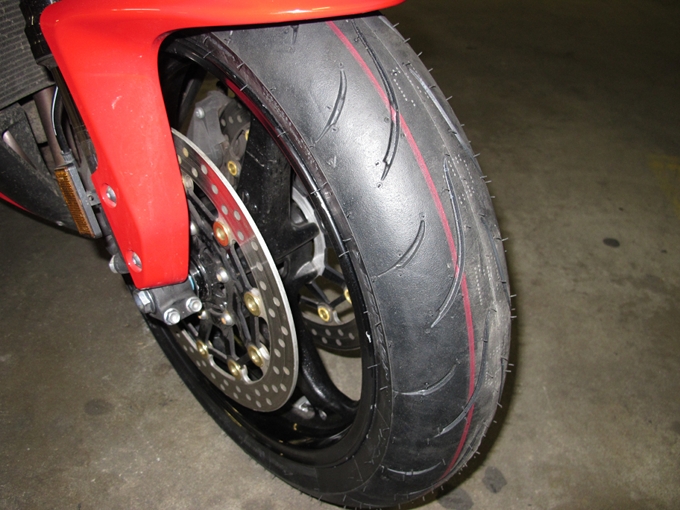
New rubber.
Ready to re-install the wheel. Insert the two wheel collars. If your right (throttle) side collar was bigger than the left (clutch) side, make sure not to mix them up.
Apply a thin layer of grease to the front axle surface.
Position the wheel between the forks, making sure that the rim and tire are oriented correctly: the 600RR has directional rims and tires which are only meant to spin in one direction. Arrows indicating the direction of spin are clearly marked on both the tire and the rim.
Insert the axle from the left (clutch) side of the bike. Lightly tap the axle all the way in. It can be tricky to line up the right side fork with the axle when doing this alone. A method that works for me is grabbing a hammer, laying down and looking at the axle alignment through the right side fork, while positioning the wheel with my left arm and tapping the axle in with my right. I find that using a light-weight hammer helps, and propping up a flashlight to shine through the right side fork leg is a must, at least in my dark workspace.
Using the 17mm Allen Hex-L wrench on the left (clutch) side to provide resistance, use a 1/2″ drive torque wrench to tighten the 22mm axle bolt on the right (throttle) side to 44 ft/lbs.
Tighten the right (throttle) side axle holder bolts to 16 ft/lbs.
Put both brake calipers back on. Dab some blue loctite on the caliper bolts and tighten to 33 ft/lbs.
Remove the front stand, putting the front wheel on the ground.
Check the front brake operation by applying the brake lever. It may be soft initially, if you pushed the brake pads apart while removing or re-installing the brake calipers, in which case you need to give it some squeezes before the pads bite.
When the front brake is working well, apply it, grab the handlebars, and pump the fork up and down several times to seat the axle and prevent it from binding.
Finally, tighten the left (clutch) side axle holder bolts to 16 ft/lb.
Put down the kick-stand, and take the bike off the rear stand.
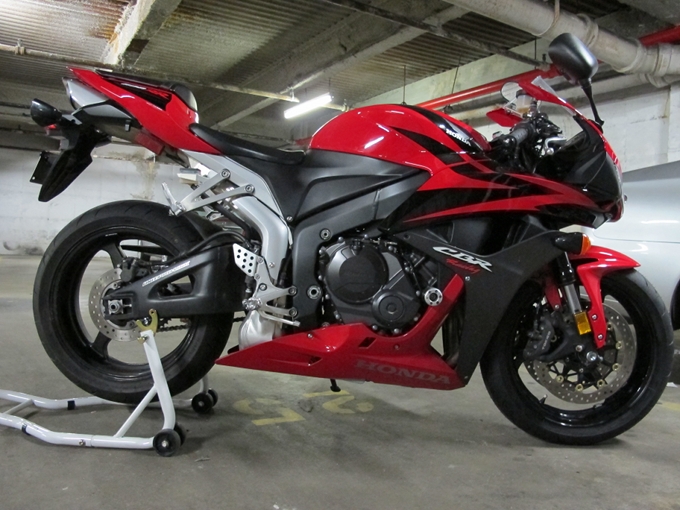
All done.
Ready for spring!


2 Comments for "How to remove and re-install the front wheel on a 2007-2008 Honda CBR600RR"
Leave a comment
is that yours? *drool* asteeeeeeeeeeeg!
not mine :P hubby’s and this is hubby’s post